Start with a shape you can finish
Your first sculpture does not need to be large or complicated. Choose something that fits comfortably in your hand, such as a turtle, a little house or an imaginary creature. Look for a main shape you can make from one lump of clay. You can add a few smaller parts later. A simple project gives you room to experiment without having to solve every sculpting problem at once.
Make a quick sketch from the front and side, or write down three features you want people to notice. For a turtle, those might be a rounded shell, a raised head and four short feet. The sketch is a guide, not a rule. If the clay suggests a better shape while you work, you can change your plan.
Check the instructions on your clay package before beginning. Air-dry clays vary in how they feel, how thick a piece can be and how long they take to dry. Cover your table with a washable mat or scrap paper, and set out a small bowl of water, a clean cloth and a few simple tools. A craft stick, a blunt pencil and an old toothbrush can make marks and textures. Keep clay off surfaces used for preparing food, and wash your hands afterward.
Build the main form first
Knead a small amount of clay until it feels workable, then roll or press it into your sculpture’s main shape. Turn it as you work so you can see it from different angles. Does it stand the way you want? Is one side much heavier than the other? It is easier to adjust those things now than after adding tiny details.
Think about thickness as well as appearance. A very thick lump may dry unevenly, while thin projections can be fragile. Follow the package guidance for thick pieces; if needed, shape a hollow form rather than a solid one. Keep legs, tails and other projecting parts fairly sturdy on a first attempt. You can make a recognizable sculpture without giving it delicate fingers or a long, unsupported neck.
Use your fingertips to smooth broad areas, but do not worry about removing every mark. Fingerprints can become part of a handmade surface. If you want a cleaner finish, lightly dampen a fingertip or tool and smooth one small area at a time. Too much water can make the surface slippery and harder to control.
Attach parts and add character
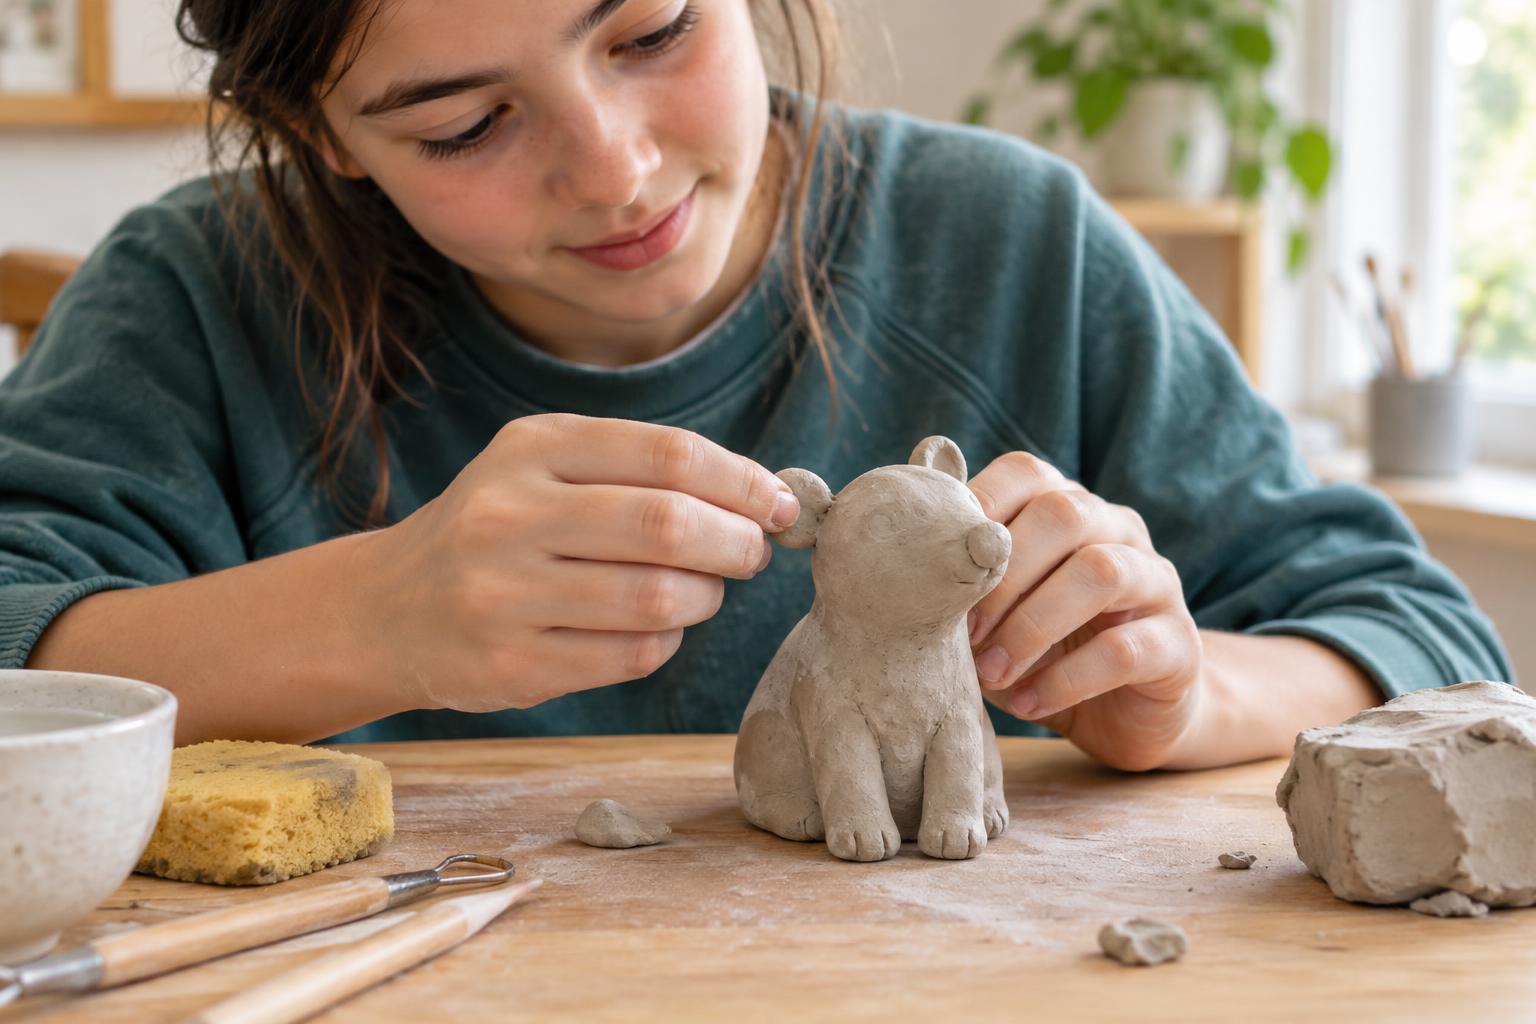
Pressing two smooth pieces together may not make a strong join. For parts such as ears or feet, lightly scratch the surfaces where they will meet. Add a tiny amount of water or clay slip, which is clay mixed with water into a paste, and press the pieces together. Blend a little clay across the seam if the design allows it. Support a new attachment for a moment and check that it holds when you let go.
Add details that help tell the viewer what they are looking at. A craft stick can draw a door on a house; a toothbrush can give a creature a textured coat. Shallow marks are usually easier to control than deep cuts. Make facial features large enough to see, rather than trying to fit in every eyelash or scale. Step back occasionally and ask whether the main idea still comes through.
If a detail goes wrong, you have options. Smooth it away while the clay is workable, reshape that area or turn the mark into part of the design. Small changes are normal in sculpture. The goal of a first project is to learn what your hands and materials can do, not to copy your sketch perfectly.
Let it dry without rushing
Place your sculpture on a clean surface where it will not be bumped, and follow the package’s drying directions. Drying time depends on the clay, the sculpture’s thickness and the conditions in the room. The outside may feel dry before the center is ready, so avoid painting or sealing it just because its surface has changed color. If the instructions recommend turning the piece, move it gently and support any fragile parts.
Keep unused clay sealed according to its package directions while you work and clean up afterward. Put scraps in the trash rather than washing lumps of clay down the sink. If your finished sculpture has a rough spot, handle it gently; avoid creating airborne dust by sanding dry clay unless you have appropriate guidance and protection.
Once the piece is fully dry, you can leave it plain or decorate it with paint suitable for the clay. Check the package before choosing a finish. Many air-dry clay pieces are best treated as indoor decorations, not as containers for food or items that need to hold water. Display your sculpture somewhere stable, then notice what you would try differently next time. A sturdier join or a new texture is a good starting point for your second piece.