What is a mini zine?
A zine is a small, self-made publication. It can hold a story, a comic, a collection of drawings, a guide to something you know, or a mix of all four. You decide what belongs in it. A one-sheet mini zine is a good place to start because the paper becomes the booklet: you do not need staples, glue, or a printer.
For this version, gather one sheet of ordinary paper, a pencil, and scissors. Add pens or colored pencils if you like. The finished zine has eight small pages, counting the front and back covers. You can make a practice copy before drawing anything; it is easier to understand the page order once you have a booklet in your hands.
Fold the paper and make one cut
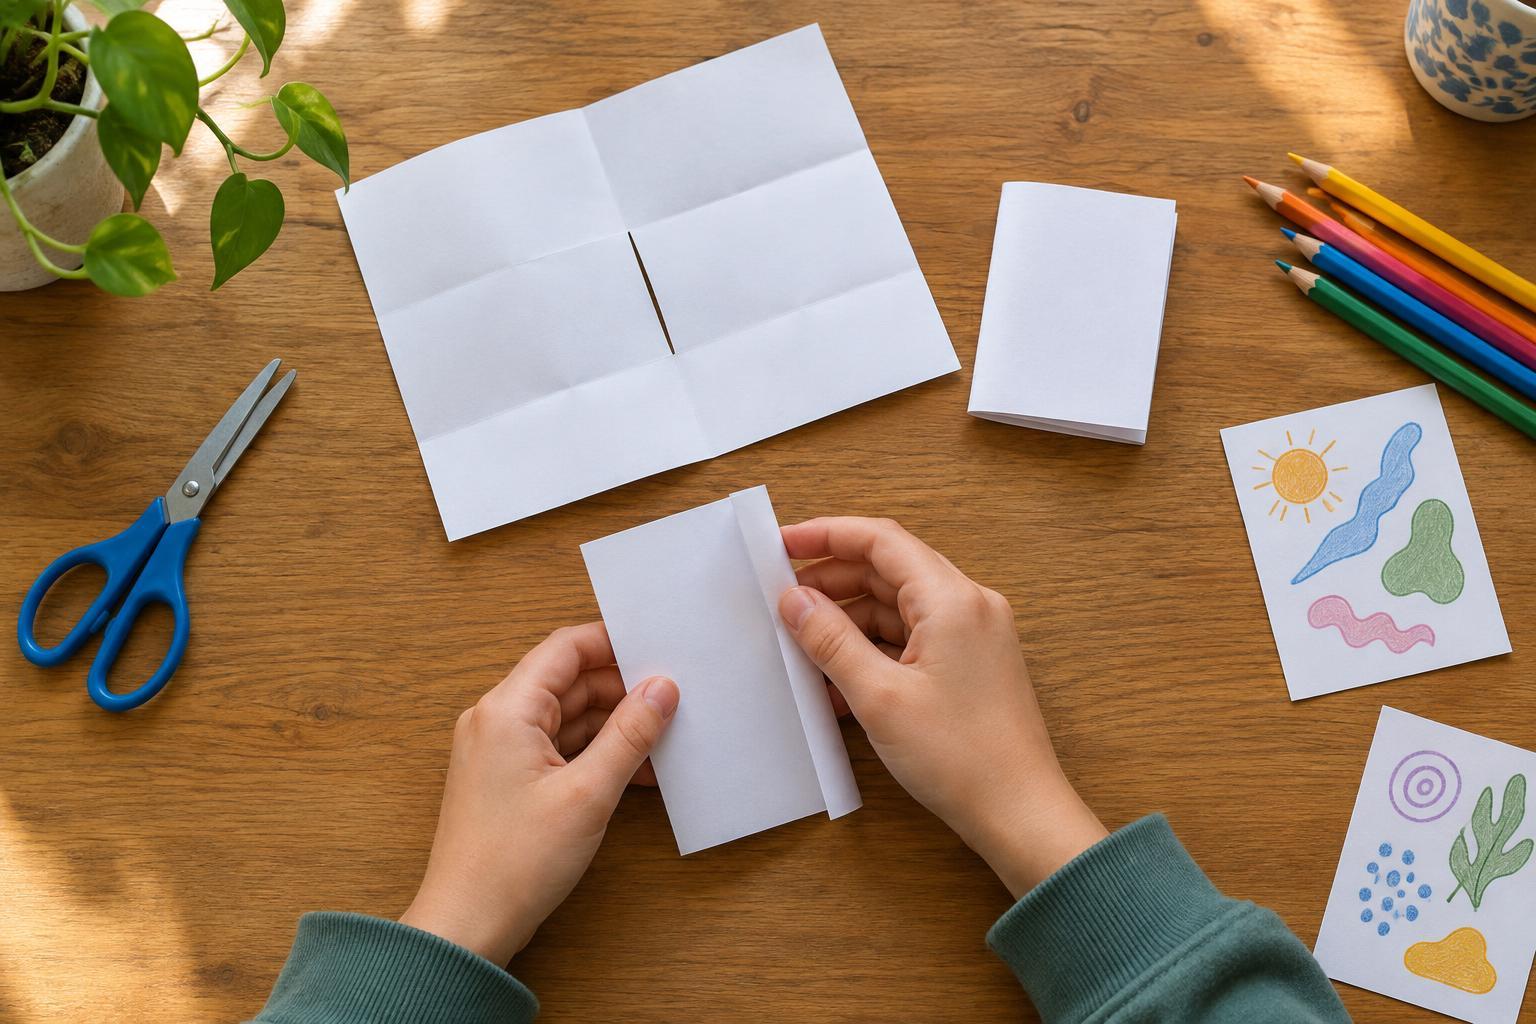
Place the paper in front of you with its long edges at the top and bottom. Fold it in half by bringing the top long edge down to meet the bottom long edge. Crease it, then open it flat. Next, bring the left short edge over to meet the right short edge. Crease and open it again. You should now see one horizontal and one vertical crease.
Fold the left short edge in to meet the vertical center crease, then open it. Do the same with the right short edge. The creases divide your sheet into eight rectangles: two rows of four. Lay the paper flat and find the horizontal crease across the middle. Along that crease, cut only between the first and third vertical creases. In other words, the slit crosses the two middle columns but does not reach either outside edge. Use scissors carefully, and ask for help with the cut if you need it.
Refold the paper along the horizontal crease so it forms a long, narrow strip. Hold the short ends of the strip and gently push them toward each other. The slit should open into a diamond shape. Keep pushing until the paper forms a cross with four sections sticking out, then bring those sections together and flatten them into a booklet. If it resists, check that the slit ends at the correct creases rather than forcing the paper.
Plan the pages before you decorate
Flip through your folded booklet and lightly number its pages from one to eight. Page one is the front cover; page eight is the back cover. Now unfold the sheet. The page numbers will look scattered, and some may be upside down. That is normal. Use the numbered sheet as your guide while you work so every word and drawing faces the right way when the zine is folded again.
Pick an idea small enough for the space. You might make a tiny comic about a lost sock, a guide to caring for a houseplant, a collection of invented creatures, or a list of things you notice on a walk. Give the front cover a title that hints at what is inside. For the middle pages, try one idea or scene per page. Leave the back cover for a final thought, a small drawing, or your name if you want to include it.
Start with pencil, especially near the folds, where details can be harder to read. Keep important words away from the page edges and the cut. If you use markers, test them on a spare piece of paper first; some inks show through to the other side. There is no need to fill every corner. Blank space can make a tiny page easier to enjoy.
Make it yours, then share it your way
A zine does not have to look polished to be worth making. Handwritten captions, uneven panels, and changes of direction can all be part of its character. If a page does not work, turn it into a surprise: draw over it, add a speech bubble, or let a character comment on the mistake. The small format makes it easy to experiment without committing to a big project.
When you finish, fold the zine back into booklet form and read it from start to end. Check whether the page order makes sense and whether any words disappear into a crease. You can keep your original, show it to someone you trust, or make copies of the unfolded sheet and fold those into booklets. Before sharing a zine about real people, think about what they would be comfortable having others read. Your zine is yours to shape, including the choice to keep it private.